Tormach 1300PL CNC Plasma Cutter
Description
Will fill this in later. Add work envelope and cutting capacities
Tormach 1300PL manual https://tormach.com/media/asset/u/m/um10720_1300pl_0722a_web.pdf
Pathpilot user guide for plasma https://tormach.com/media/asset/u/m/um10770_pathpilot_guide_plasma_0722a.pdf
Hypertherm Powermax45 XP plasma cutter manual https://www.hypertherm.com/en-US/hypertherm/powermax/powermax45-xp/
Consumables
Tool Chains
work in progress
Remote/cloud access. Pathpilot hub https://hub.pathpilot.com/about
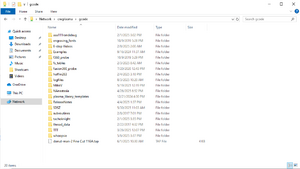
In order to post your job from the sheetcam pc attached to wall, navigate to: \\cncplasma\gcode in file explorer
Use
Tormach CNC Plasma Cutter Debugging
Tormach Plasma CNC Settings and Capabilities
Step by Step
A work in progress, edit as needed
Machine setup
Make sure the table is clear of any possible obstructions. Make sure the gantry crane is clear of the machine, especially the chains.
Check the slat area you will be using for any lumps of slag that would make your material not sit flat.
Add water if needed to bring the level to about ¼ inch below the top of the slats. There is a 5-gallon bucket by the computer for you to use.
On the control box, release the emergency stop button, turn on the master switch, and press the start button. The button should turn blue and Pathpilot should start up.
Click the Pathpilot reset button.
Jog the torch to an accessible location (keyboard arrows & pg up & pg dn), and remove, inspect, and reinstall the consumables as needed. Note: if you jog the machine all the way to the limit switches, you will have to restart the machine.
Click the Ref Z button first, then the Ref Y & Z buttons. The torch will move to the back left corner of the table.
Put your material on the table. Weight down as necessary. Attach the ground clamp.
Jog the torch to where you want your job X & Y zero coordinates to be.
Lower the Z axis close to your material ½ inch or so? Verify this step?
Click the X,Y & Z Zero buttons.
Select your material using the auto F&S selector drop downs. Note the amps required setting in the pop up window.
Hypertherm Plasma setup
Turn on Hypertherm machine at the back of the Tormach, you should see three green lights.
Check that Hypertherm Amps setting matches the amps required setting in the Pathpilot pop up window, adjust as necessary.
Run your job
If you haven’t already, load your Gcode, click the reset button if flashing.
Check the toolpath window to see if everything looks correct.
You may want to do a “dry run” as a double check. (button is opposite reset)
Close the curtains.
Run Job. Click cycle start.
*Be prepared to click stop or hit Estop if something seems wrong*
Shut Down
Set the Hypertherm plasma to 45 amps if needed and turn off the machine.
Push the E stop.
Turn off the main switch on the control box.
Clean up around the area and put any scrap metal in the garbage can that is marked for metal scrap only.
Maintenance
(Shamelessly copied from page 58 in the manual)
Daily
- Clean the machine of any dust or abrasive particle buildup with a vacuum and brushes.
- Wipe dust off of the linear rails with a clean cloth.
Weekly
- Clean all exterior surfaces with a mild cleaner.
- Examine the water table's level and, if necessary, add water / rust inhibitor (GreenCut).
- Check your plasma torch consumables for wear and replace if needed.
Monthly
- Clean the electrical cabinet vents of dust with a clean cloth or compressed air.
- Remove the slats and clean sediment buildup from the bottom of the water table.
Semi-Annually
- Check drive belts for wear and re-tension if needed.
- Remove faceplate from torch lifter and clean lead screw with a lint-free cloth.
Status
1/3/23: Working great, getting ready for authorizations
12/9/22: Waiting on power for the plasma torch.


